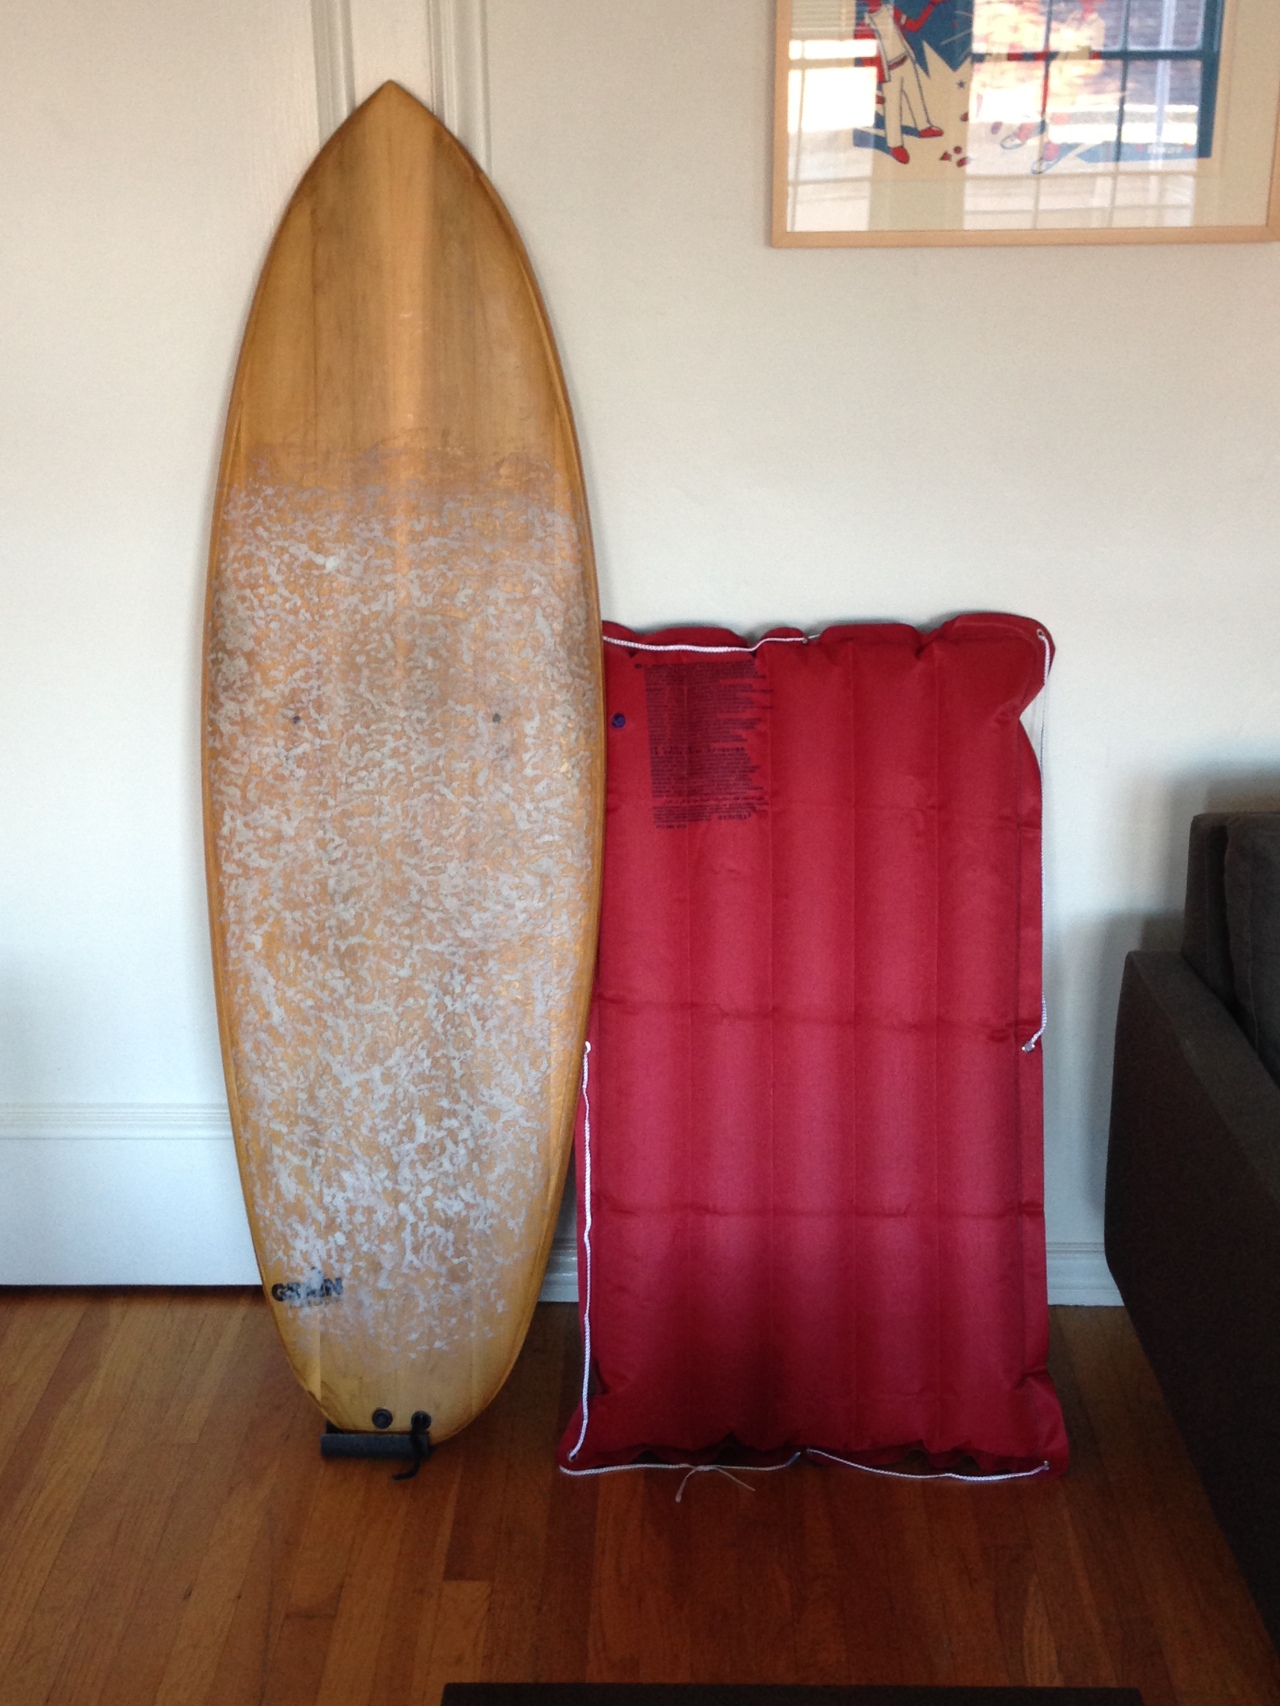
My Hipster Surf Quiver Is Complete

I’ve been sitting on this post for a long time and I’m not sure why. I completed my hipster surf quiver back in January on a trip to Guerneville.

The town’s five and dime was showcasing this surf mat in its window, and I happened to be strolling by when it caught my eye.

I’ve surfed a wooden board for a couple years now thanks to my brother Chris gifting it to me after he brought it out to San Francisco with him on a trip. Now, with a surf mat, my hipster quiver is whole.

The mat’s inflated for this photo, but I’ve yet to surf on it (which is pretty hipster).

Silvio, a very stoked Italian surfer

Every once in a while I post something on the Ice Tubes facebook page. I’m not the biggest facebook-er, so maybe 1-in-5 posts that we publish here make it to that page. Despite the frequency of “promoting” we’ll do on facebook, we recently got a nice message from a surfer in Italy – yes, the country surrounded by a sea and not an ocean – who was a fan of the stuff we post on this blog of ours. His name is Silvio and his home break is on the north east coast of Italy.

silvio wooden board

I sort of relate to Silvio in a way. I grew up surfing on the east coast of the United States. In New York, on Long Island. It’s not know for its waves, but heck it’s an island man, and waves break pretty well on one side of that island. So Silvio, like us New York surfers, knows the importance of short chunky boards for small waves. He made this hollow wooden board, which he’s calling Bonsai, in the shape of a mini-simmons and puts it to use on the coast of Italy.

You can see more pics of Silvio’s board and other aspects of surfing in Italy on his blog.

And if you’re curious what the surf spots in Italy are, like I was, here’s a crumby map 🙂

italy surf spot map

Waxing Your Biscuit in San Francisco

Turns out surfboards made of wood, under 6-feet tall, are actually pretty ideal for riding the waves at Ocean Beach. Chris brought his newly built wooden “Biscuit” out with him to San Francisco recently, and waxed it up for it’s first party in the Pacific.

Grain Surfboards

And here’s what surfing in sunny California is like. Looks like a scene from The Goonies, but the wind eventually did back off and we ended up getting some nice waves on the wood board’s first time in the water.

Grain Surfboards Is Coming To San Francisco To Teach Us How To Make Wooden Surfboards

[photo via Grain Blog]

Grain Surfboards is leaving Maine for a short period of time this Fall to visit San Francisco and host their first “traveling” wooden surfboard building workshop. The guys at Grain teamed up with San Francisco Surfrider and Sustainable Surf to put on the weeklong class, taking place September 25-October 1 at the Engine Company #33 Firehouse in Oceanview.

According to the Grain blog:

York Maine is a long way to come for a lot of people, so a few years ago we started thinking about taking our show on the road. Thanks to some friends on the west coast, we’re going to hold our first Traveling Workshop in the fabled City by the Bay.

I’ve already made two wooden surfboards using the kits Grain sells online, and both boards came out looking amazing, not to mention the pride you feel from being able to make a surfboard out of wood.

The workshop isn’t cheap – tuition for the weeklong class is $1,975 – but the cost of all the woodworking tools and supplies that were needed to build my first two boards was far from free. I also had to call Grain’s shop more than a few times with questions.

They’re a good group of guys at Grain, and you can visit their classes page for more details about the upcoming San Francisco workshop. Also checkout the west coast workshop post on SustainableSurf.org.

Adding Rails And A Top Deck To Your Wooden Surfboard

The last time I posted about the wooden version of the Channel Islands Biscuit, I was starting to glue the rail strips in place. This step takes a little bit of time, as you have to make sure each strip is fitted tight and firm next to each other. The time alone that it takes for the glue to dry will make this a lengthy step in the board building process. You’ll have glue dripping through the rails as you do this, so be sure to wipe off any of the excess glue as you go. Don’t worry if you miss some as you’ll be able to remove it later.

Your rails will have a corduroy look to them. Remove the extra wood and glue from the rails to give your self a clear look at the shape of the rails.


After getting your rails on, you’ll need to cut in your “lands”.  The “lands” are where the top planks meet the rails. I use a spoke shave and sanding block to cut away the rails in order to form my lands. Be careful to take away only what you need from the rails. Once its gone its not coming back. You’ll want to have a smooth outer line on your lands. The smoother the line the better the top of your board will look.

When your lands are ready its time to glue on the top of your board. Make sure the blocking for the fins and air vent are inserted and clearly marked so you’ll be able to locate them. I used a whole bunch of straps and hand clamps to press the top plank down. You want a tight fit with the top of your board, so don’t be shy with the amount of glue and clamps you use.

Let the board sit for an entire day so the glue has time to dry. When you remove the claps, you’ll have a “wood blank” ready to be shaped.

The ‘Ultralight’ Wooden Surfboard

Last year I built a wooden surfboard from a kit designed by the great people at Grain Surfboards. It was my first attempt at building a wooden surfboard, so I brought my father on to help with the project. When it was all said and done, the outcome of the venture was 1) a finished all wood surfboard, and 2) the idea to build the Ultralight, a super light weight wooden surfboard.

My dad borrowed from the design that Grain used for their broad, and came up with a frame system that he hopes will be lighter than the currently constructed wooden surfboards.

The surfboard’s frame is made out of Japanese waterproof plywood, and will eventually be finished with red cedar. My father is an architect, and it’s basically been second nature for him to design and challenge the strength of building material.

Even though my dad has only tried surfing once, an attempt he claims to have almost taken his life, he feels that surfboard design is within his reach.

The Wooden Version Of Channel Islands “Biscuit”

I’m currently working on the wooden version of the Al Merrick and Rob Machado Channel Islands Biscuit. Having been completely satisfied with my first wooden surfboard, I went with another kit created by Grain Surfboards from York, Maine.

Defining the shape

As a guide to others, I thought it would be helpful to post photos of the board while it’s still under construction. This is the second wood surfboard I’ve worked on, and I had many questions a long the way so hopefully these photos will help other shapers with their boards.

The first steps are easy to understand using the Grain builder’s manual. The first step is to set up the outer shape of your board (see above) by glueing the keel and ribs to the bottom plank. You’ll need (several) spring clamps, straps and a jigsaw. Nothing too hard yet…

The second task is forming the rails of the board. You’re going to need wood glue, a spokeshave, and as many clamps as you can get (I feel the more clamps you have the better). The rails are 1/4″ milled ceder and will follow the shape of your ribs. You’ll need to trim and steam the rails in order for them to take the shape.

Rail Strips

Use a spokeshave to trim the strips. A spokeshave is a fairly easy tool to for someone not too “handy” to use. As long as you take your time fitting the strips this step will not be too hard. It helps me (a person just starting to make surfboards) begin to understand the reasons boards are shaped the way they are.

"Railing" your board

Your rails

Keep in mind that I’m just highlighting some of the major steps in the building process, skipping many little steps as I go, so if you wanted to know more then just feel free to ask. And again, this is a Grain kit I’m following, they are the real pros.

More to come as I find the time to build…

Hand-built Wooden Surfboard

I came across the company Grain Surfboards by chance while reading a random surf magazine.  Grain Surfboards make custom wooden surfboards in the coastal town of York, Maine.  In addition to the boards that they make, Grain also sells surfboard kits so you can enjoy the art of crafting your own wooden board.  Each kit comes with planks of white cedar, a pre-cut keel (the shape) and a how-to manual — The rest is up to you.

The start

The start

The board (see below) took me 11 months to finish, and a bit more money then I would like to admit. When I started building the board I had no real previous knowledge of wood working or surfboard design.  The process had me learning how to use tools that I had never even heard of. I put my fiberglassing skills to work for the first time, and fell in love with the idea of a wood surfboard.

My shaping room

My shaping room

The surfboard I built was a 6′-4″ fish named by the guys at Grain as the “Wherry” (I brought the finished board to their shop in York). I took the board out in the ocean for the first time a couple days ago in good, clean, chest high waves.  The board road great and had a smoother feel than any my foam boards.  The best part is how it looked in the water, just sick!

My board

My board

enjoy

enjoy